How To Tie An Eldredge Knot
We can only describe the Eldredge Knot as a work of art. It offers a tapered fishtail effect that requires precision, patience and a little OCD. It was invented in 2007 by a man named Jeffrey Eldredge who was sick of wearing the classic Four-In-Hand Knot to work everyday.
The Eldredge Knot uses an unorthodox technique as it manipulates the narrow end as opposed to the wide end of the tie. This tie knot exudes luxury and opulence with every detail, which is why Mr. Eldredge himself has said, “I think a wedding is exactly the perfect place for such a knot”. We’ll be honest with you, the Eldredge Knot is complex and involves 15 separate steps.
However, if you happen to finish it, you sir, are a man of true mastery and exquisite taste. We take our hats off to you.
The
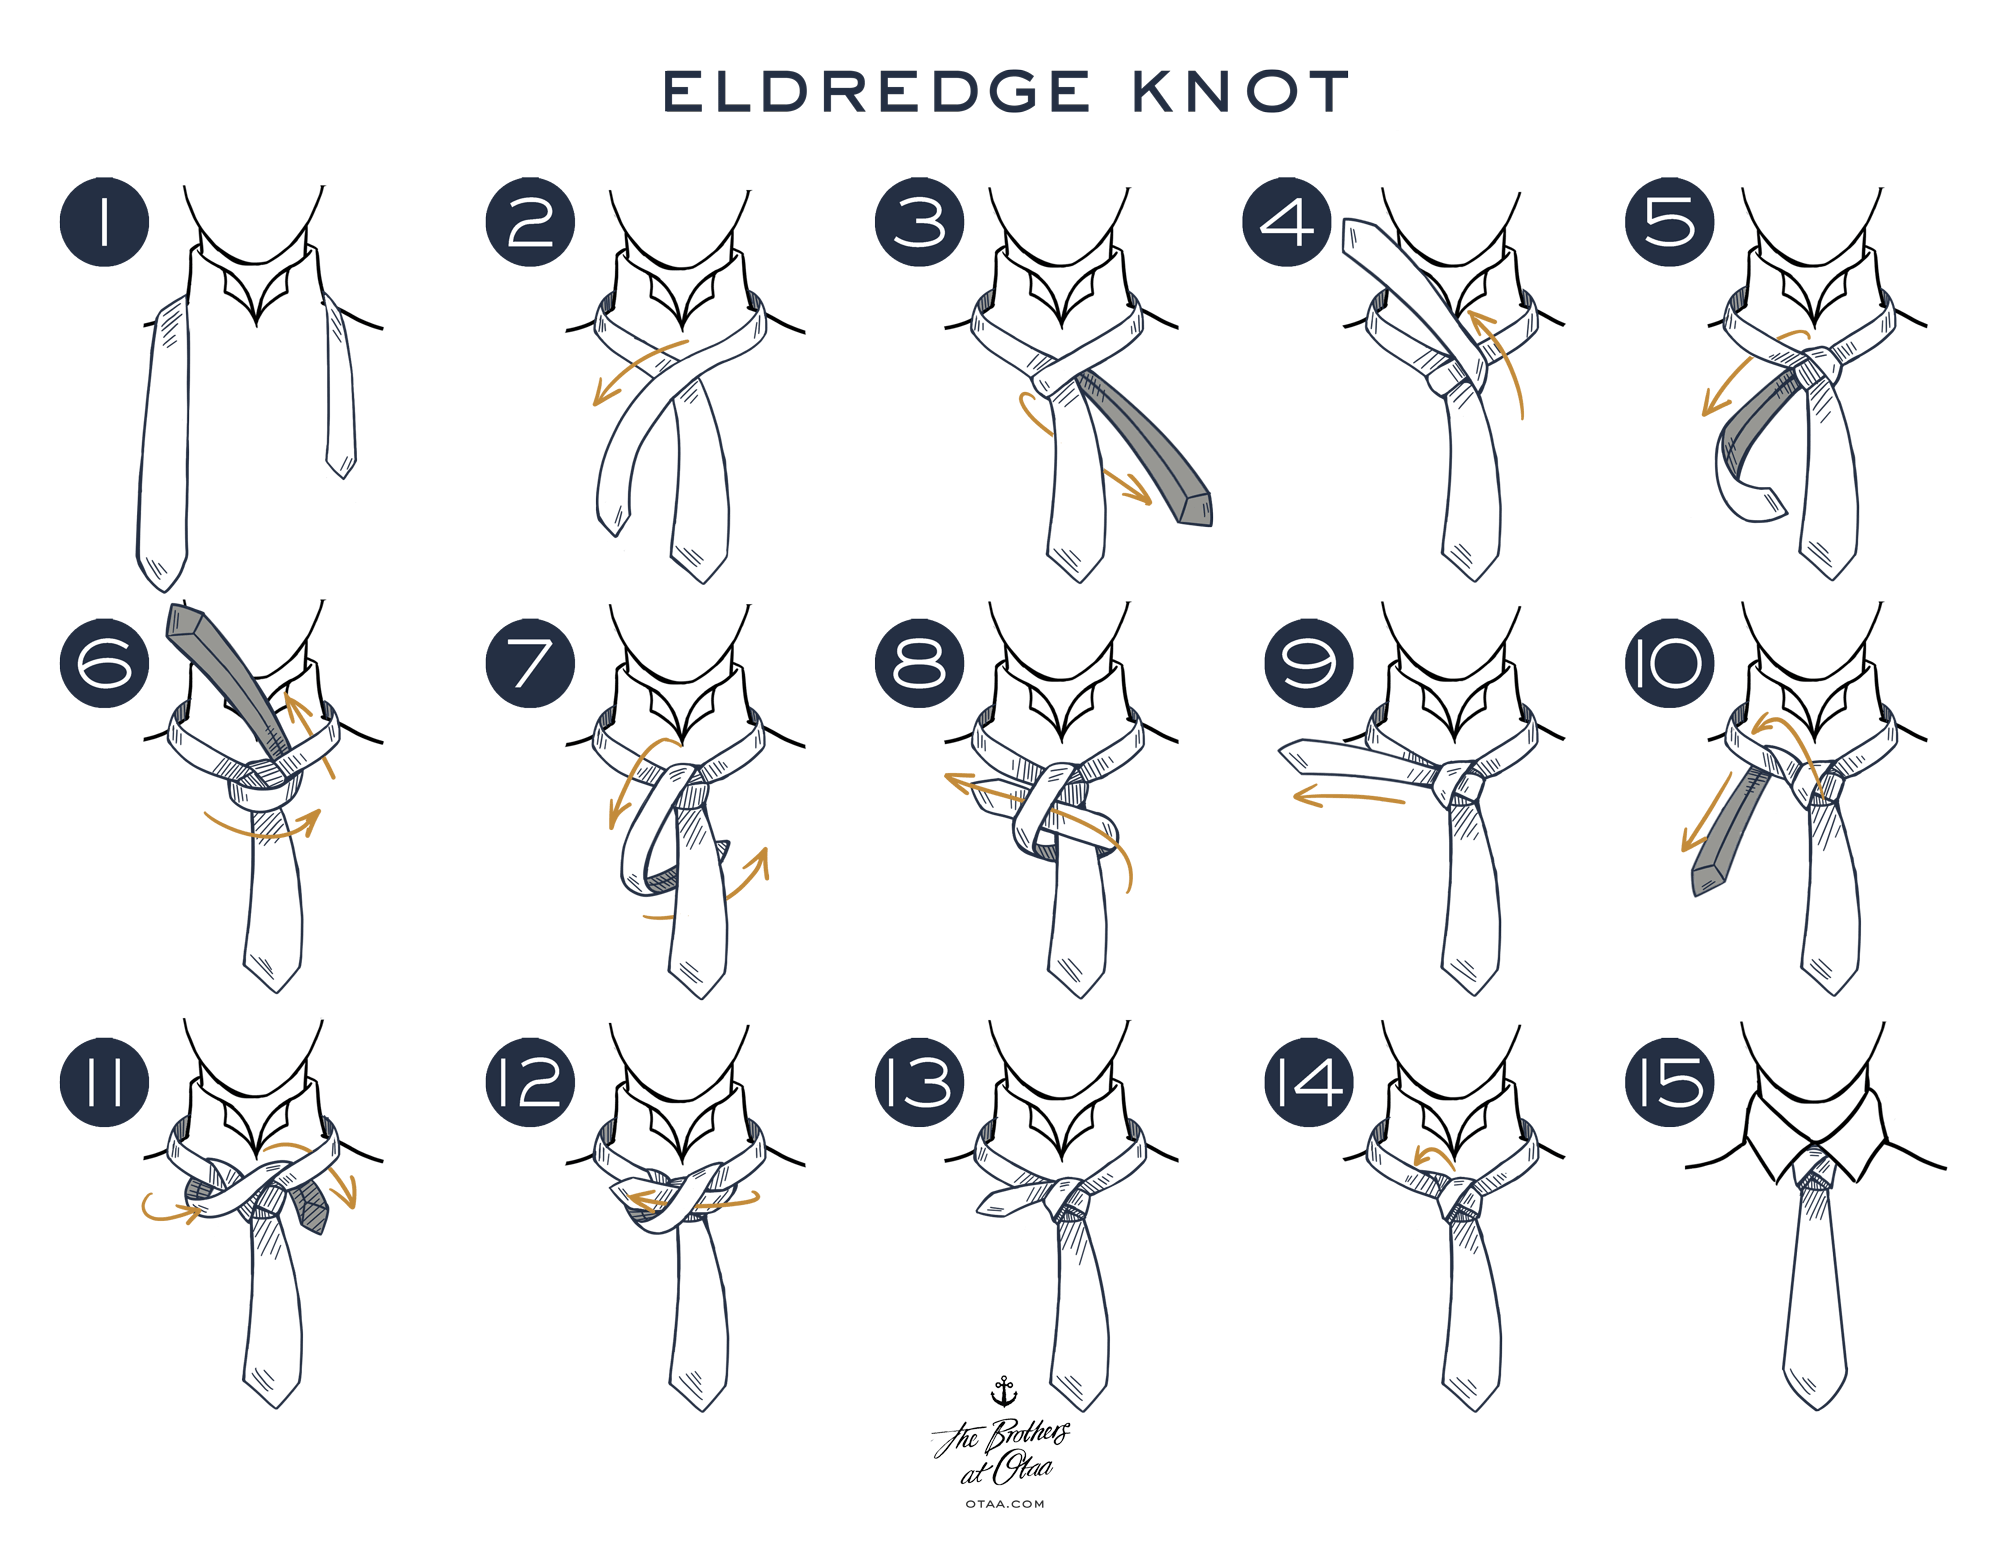
Eldredge Knot tying steps


- Place the tie around your neck with the wide end on the left and the skinny end on the right. Position the wide end to the length you’d like it to finish at the end.
- Cross the skinny end over the wide end towards the left.
- Wrap it underneath the knot towards the right.
- Pull it up through the neck loop from underneath and then pass it down to the left side.
- Cross it over the knot towards the right.
- Pull it up through the neck loop from underneath and then pass it down to the left side.
- Wrap it underneath the knot towards the right. Keep this part loose.
- Cross it over to the left and through the loop you’ve just created in the previous step.
- Pull the skinny end towards the left to tighten it.
- Pull the skinny end towards the left to tighten it.
- Pull it up through the neck loop from underneath and then pass it down to the right side. Keep this part loose.
- Cross it over to the left and through the loop you’ve just created in the previous step.
- Pull the skinny end towards the left to tighten it.
- Tuck the rest of the skinny end behind the neck loop on the left side.


